|
|
Post by Mrs Vindecco on Sept 23, 2012 10:17:33 GMT
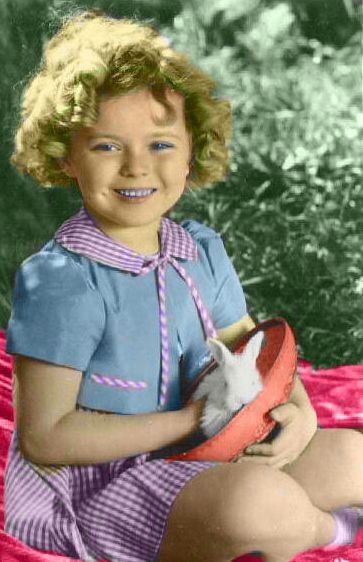
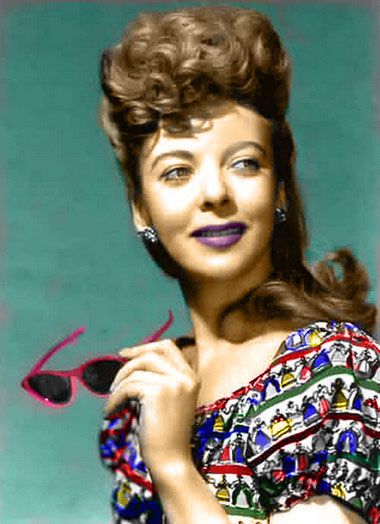
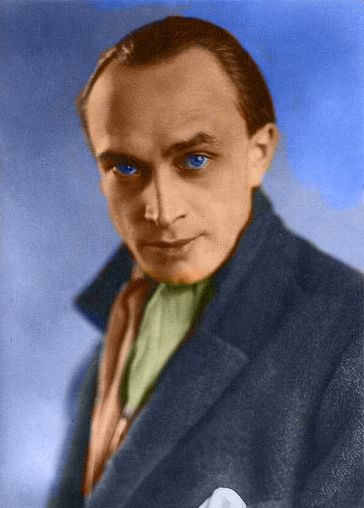
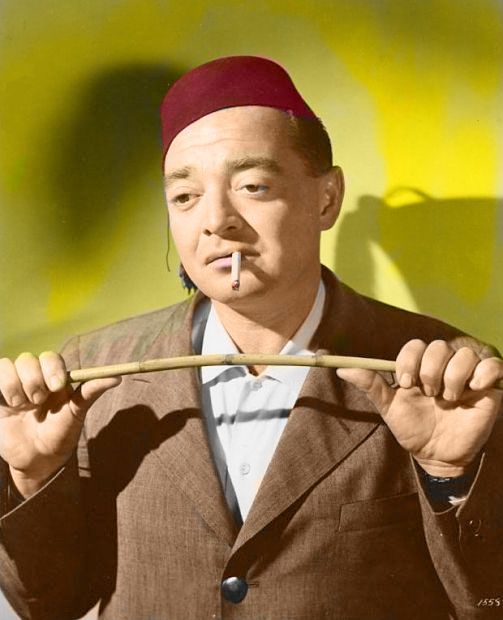
I was waiting around for viewers for our flat yesterday and decided to try colourising some B&W photos using photoshop. It's been a while since I have done this and it's always a bit of a work in progress with me, but thought I would share these anyway. If other members do this, please share because I really need hints to improve them. Shirley Temple  Ida Lupino  Conrad Veidt  Peter Lorre  |
|
eire
Lead Juvenile
 The Shrimp!
Posts: 9
|
Post by eire on Sept 24, 2012 23:53:47 GMT
I used to colorize photos a lot more but I can't find enough time for it nowadays, unfortunately. Here's some of my Jean Harlow ones, she's my favourite person to colorize.   Mrs V, what version of Photoshop do you have and how do you usually colour your photos? I use Adjustment layers rather than the normal layers set to 'Color' or another option. I think you've got a good idea of colorizing so far, you've got a steady hand and attention to detail (love Ida's shirt!  ). Usually when I'm colouring I have a real-colour photo of the star or a person with similar colouring to use as a reference. I'm not a pro or anything but if you want, I can give you some tips or something. xD  A man named Victor Mascaro does nice ones of Jean Harlow, Google his name and you can see some of them. |
|
|
|
Post by Mrs Vindecco on Sept 25, 2012 9:33:54 GMT
Wow, these are amazing Eire. Jean Harlow's blonde hair is especially good, you've really captured platinum perfectly. Any hints and tips you could offer me would be really appreciated. Eventually I want to tyry and work on some family photos for my Mum. I shall definately check out Victor Mascaro's work.
|
|
eire
Lead Juvenile
 The Shrimp!
Posts: 9
|
Post by eire on Sept 29, 2012 6:00:50 GMT
Here's a quick example colorization I made. It at least gives a basic idea as to how I colour. This image is unfinished but I think that doesn't matter at the moment lol.  Before I even begin to colour a photo, the b&w photo itself has to be somewhat "restored." It's best to use higher-quality photos in the beginning, but a lot have lost their middle-tones. It's easier to have a more realistic looking colorization if you bring the middle tones back, so everything's not so contrasted. There's some knowledge of how Photoshop works that is needed, so maybe Google some guides about Adjustment Layers and colorizing in general if this is confusing.  1. Original image found online.  2. Restored image using Curves layer, Shadows/Highlights options.  3. Tinted the whole image a light sepia colour. .  4. Coloured her skin and hair a peach colour. It's easier to blend the hairline into the skin if everything underneath is the skin colour.  5. Used a layer set on Soft Light, and using white I highlighted her eye area and teeth. Another layer set on Multiply, I darkened her cheeks. Lips tinted red. I guess I consider this the basic makeup layer. I'll usually go back once everything is done and tinker with makeup.  6. Coloured her hair yellow, making sure the highlights are a blue tone, Using Selective Color option, I brightened all and only the reds so far.  7. Coloured her eyes. Shaded her skin with a darker red/peach layer set on Multiply with the opacity at 35%.  8. Colouring the clothes go pretty much the same way. The whole dress was coloured blue, with the yellow done over the top of the blue.  9. Selective Color option, I brightened all the reds and yellows.  10. Adjusted the overall Color Balance on the whole image.  And so on, until the image is done!  I like to do more editing to the whole image once it's all completely coloured. Adding gradients and so on, or adjusting certain colours only using Selective Color or Color Balance. The more time spent on each level of colouring results in a better picture. For me, the skin is hardest to colour and I would keep editing it beyond this point where the example ends. I'd surely give more attention to her makeup, a personal choice anyway, not sure they'd wear some of the colors I put on them. But I do not aim for realism, it's more fun to just do it your own way and not try to re-create "life" so I don't worry too much if I think the colours are looking too zany.  I hope this helps somewhat, but if you got some more questions or problems I can try to help.  |
|
|
|
Post by Mrs Vindecco on Sept 29, 2012 9:55:53 GMT
Thanks Eire. You've given some wonderful tips here and I shall definately give them ago this weekend. I never even thought about preparing the B&W image before hand. I've always just clicked on RGB colour and then added a new layer. How long does this usually take? Also, do you think method would be just as effective on older photos say from 1908 or even more amateur photos taken from around this time?
I think you have captured the make-up perfectly. The good thing about colorizing these B&W images is that we can see that 1930's was a very colourful decade. Because it was mainly photographed and filmed in B&W and as a whole we tend to think of that decade as grim because of the depression etc, but when we look at fashion, art and even interior decoration, it was much more vibrant than I thought.
The 1920's for all it's Jazz and boom years, was much more sedate colour-wise.
|
|
eire
Lead Juvenile
 The Shrimp!
Posts: 9
|
Post by eire on Oct 1, 2012 4:36:55 GMT
"Fixing" the b&w image doesn't take too long at all, especially using the Shadows/Highlights feature and adjusting it around a bit. I hadn't known of this feature until I got Photopshop CS5. Previously I only had Photoshop 7 and the feature wasn't available. The Shadows/Highlights feature really is cool to me in that in brings out details I hadn't even known were there. I love just putting photos through the filter just to see what pops out of the picture. I tend to make the shadows of the picture anything but super-dark because it's more fun to colorize when there's no black in the picture, as anything too dark tends to be harder to pick up the colour you're trying to colour it. lol So I try to even out all the tones on the b&w image. Some of the loss of details is probably more to do with bad digital scans that scanned the photo too brightly, so this feature helps to restore that. ;D I think it would indeed work on early photos! The effect works really on any sort of photos, colour as well; I use it to fix modern photos too. Here's some quick before-and-after examples anyway to show you how the Shadows/Highlights filter works. It can be pretty subtle or a lot changed.         And this one you posted in the colour photography thread.  Sometimes the filter makes them almost look more like drawings or paintings, which is kind of neat.  And in keeping with this thread, here's one I did of Edwardian actress Mabel Love.  lol maybe I did too much makeup for an Edwardian gal. Or maybe not. xD  Yeah, it's really neat when one can actually see actual colour photographs, or view even vintage clothing from the 30s. I know that when Victor Mascaro did a lot of his Harlows, he actually coloured many for collectors who actually the own the costumes she wore in the photos, so he got to colour them accurately actually. I always feel like I never get it right, so sometimes I purposely go with something strange or more modern looking when colorizing anything, haha.  Anyway, there's some neat clothes examples here: www.dorotheasclosetvintage.com/1930s.html'30s clothes were indeed really bright! Makes me wanna go colorize some more full-body pics. |
|
|
|
Post by Mrs Vindecco on Oct 2, 2012 19:56:46 GMT
These are great Eire, very inspirational.
|
|
|
|
Post by Mrs Vindecco on Oct 2, 2012 23:43:15 GMT
|
|
eire
Lead Juvenile
 The Shrimp!
Posts: 9
|
Post by eire on Oct 3, 2012 19:22:31 GMT
|
|
|
|
Post by Mrs Vindecco on Oct 4, 2012 9:47:52 GMT
I didn't mean to post the Stanwyck image because she looks decidedly grey in the face, though when I saved it on photoshop she looked more rosy cheeked  Don't know what happened there. Thanks for the links Eire, I shall definitely check them out. |
|